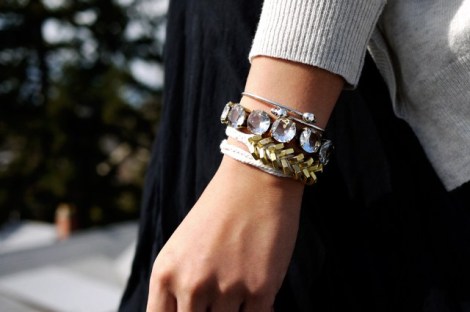
DIY- Φτιάξε μόνη σου κοσμηματοθήκη για τα δαχτυλίδια σου!
και δες και άλλους τρόπους βήμα – βήμα

και δες και άλλους τρόπους βήμα – βήμα


 Κοίτα να δεις που σε λίγο θα αγοράζουμε τα υλικά για τα κοσμήματά μας από τα χρωματοπωλεία. Η Erica από το HonestlyWTF.com μας δείχνει πως να φτιάξουμε ένα βραχιόλι με σκοινί και παξιμάδια.Θα χρειαστείς:
Κάνεις ένα κόμπο με τα σκοινιά σου και αρχίζεις να πλέκεις κοτσίδα για 2-3 εκατοστά. Περνάς ένα παξιμάδι στο αριστερό σκοινί και συνεχίσεις να πλέκεις, μόλις φτάσεις στην δεξιά πλευρά περνάς άλλο ένα και συνεχίζεις να πλέκεις. Κάνεις το ίδιο μέχρι να βάλεις όλα τα παξιμάδια στη θέση τους. Πλέκεις άλλα 2-3 εκατοστά σκέτη κοτσίδα. Έτοιμο!
Recycle an old pair of jeans into a funky bag with this tutorial by Stefi Luca. Use a bright fabric like the red fabric pictured for the lining and embellishments.
i
Materials:
Instructions:
When you have all the materials at hand, we can proceed to the next step.
Level the top edges of the waistband and pin them together. Cut the jeans a few inches under the crotch point. Then separate the front and back sides at the crotch area.
Sew the front legs (as to cover what used to be crotch area), which will make your short jeans look like a skirt.
Turn the jeans inside out, pin again the top edges of the waistband on the wrong side and sew the bottom. Cut out the remaining fabric, after sewing.
Lay the jeans on the folded linen and cut it along the line of the jeans: 1 inch exceeding the waistline. Sew the linen on the wrong side. Before sewing you can add some inner pockets if you wish, if not – no biggie as there are plenty of outside pockets.
I applied two inner pockets, one regular and one phone pocket to which I added a lid. I followed my dad’s suggestion when seeing my green bag: “What if you turn your bag upside down looking for something inside, your phone may drop down”.
Cut two strips out of the jeans legs and two out of the linen. I wanted really long straps so I created one strap from one strip and a half. Sew them and get two lined straps.
Place the straps between the jeans and the lining and sew them all together. Add a fastening device. I have first thought of sew-on snaps but finally gave in for an easier solution.
It’s time now to use the last ingredient, your imagination, to give the bag the last really nice touch into the funky spirit.
Here we have a funky scrap bag.

Burn brown grocery bags to create decorative ivy with the look of metal. Heidi Borchers of Inspired at Home shows us how.
This technique was discovered by Katy Ogle in the 1960’s when she was testing the Aleene’s Tacky Glue for flammability. Who would have ever thought that you could burn glue to create the look of metal!
Materials
Instructions
Heidi’s Designer Tips: It’s really fun to experiment with different “antiquing” variations. On this design I used copper Rub ‘n Buff along with two colors of green acrylic paints to achieve a patina effect. For easiest application and great results, just dip your finger into the paint (or Rub ‘n Buff), gently wipe off excess onto a paper towel, and use your finger to apply in a “dry brush” effect. Repeat for each color. Be sure to leave some of the burnt black showing through. This gives the leaves interesting coloring and texture.
image: http://www.favecrafts.com/master_images/Unexpected-Ideas/BBB_ivy_cu.jpg

Read more at http://www.favecrafts.com/Unexpected-Ideas/Burnt-Brown-Bag-Ivy#ewpk1Humw96I7a8S.99
«Painted white canvas and clay handles combine to give this bag a super clean designer look. No pattern is necessary for sewing this project or for making the clay handles. Really easy steps make this a short weekend project. The two inside pockets are optional.»
Project TypeMake a Project
Time to CompleteWeekend project
Sewn byBoth Hand and Machine
Read more at http://www.favecrafts.com/Sewn-Bags/My-Favorite-Things-Bag-Pattern#PBXmpEmtQDI1eFeD.99

By: Tiffany Windsor of Inspired at Home
Use inexpensive brown grocery bags, florist wire and glue to create surprisingly elegant garden or plant stakes. This unique technique gives an antique metal look at a fraction of the cost. This project comes to us from Tiffany Windsor of Inspired at Home.
Materials:
Instructions:

Step-2.jpg
